Create your first site
Create a site with AI, a template or a blank page, find your way around the site dashboard and publish it.
This page walks you through creating a site, finding your way around its dashboard and publishing it for the first time.
Step 1: Name the site
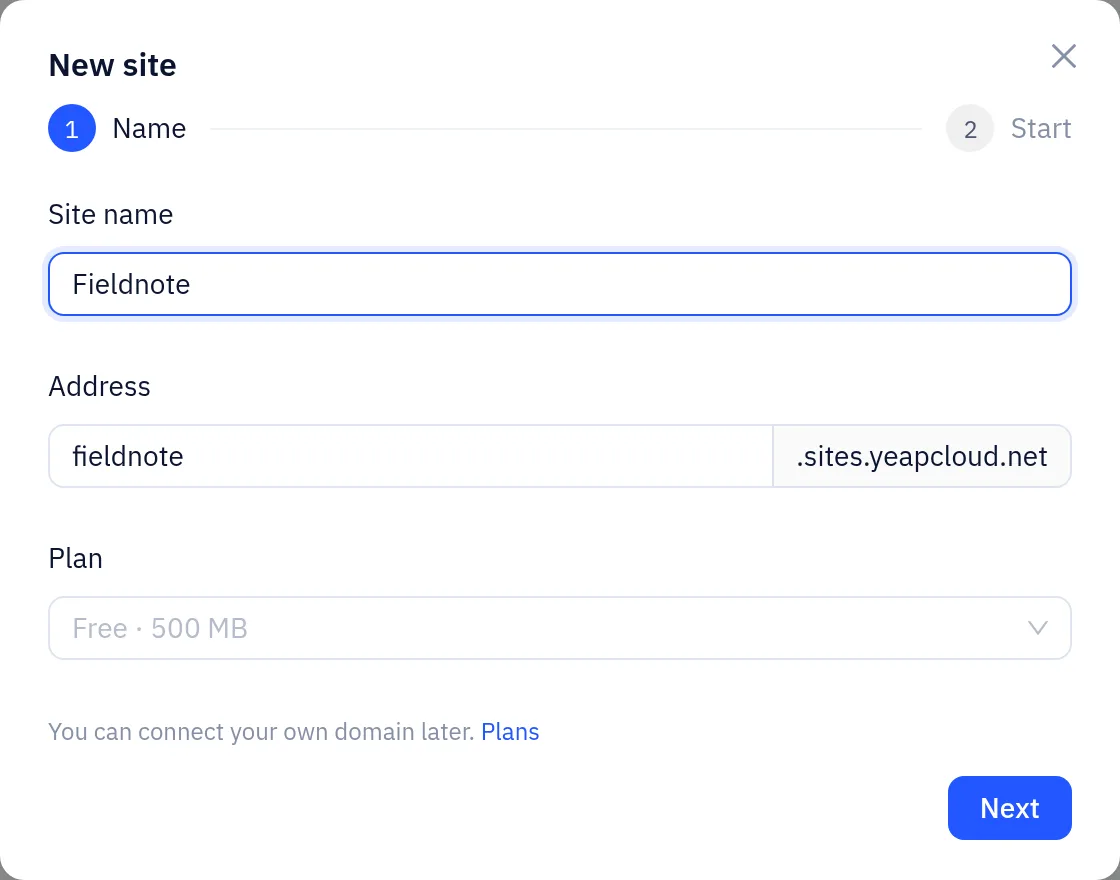
- Go to Sites and click New site.
- Enter a Site name, for example your business name.
- Check the Address. It is filled in from the name and becomes your free address
<address>.sites.yeapcloud.net. Use 3–40 lowercase letters, numbers and hyphens. You can connect your own domain later. - If you have a paid Sites plan, choose it under Plan. Leave it empty to use the free plan.
- Click Next.
Step 2: Choose how to start
Pick one of three ways:
| Option | What you get |
|---|---|
| Template | A finished design with sample pages, for example a café, a salon or a clothing store. Click Preview on a card to look through its pages before you choose |
| Describe your site | AI builds the pages from your description |
| Blank | An empty home page |
Build with AI
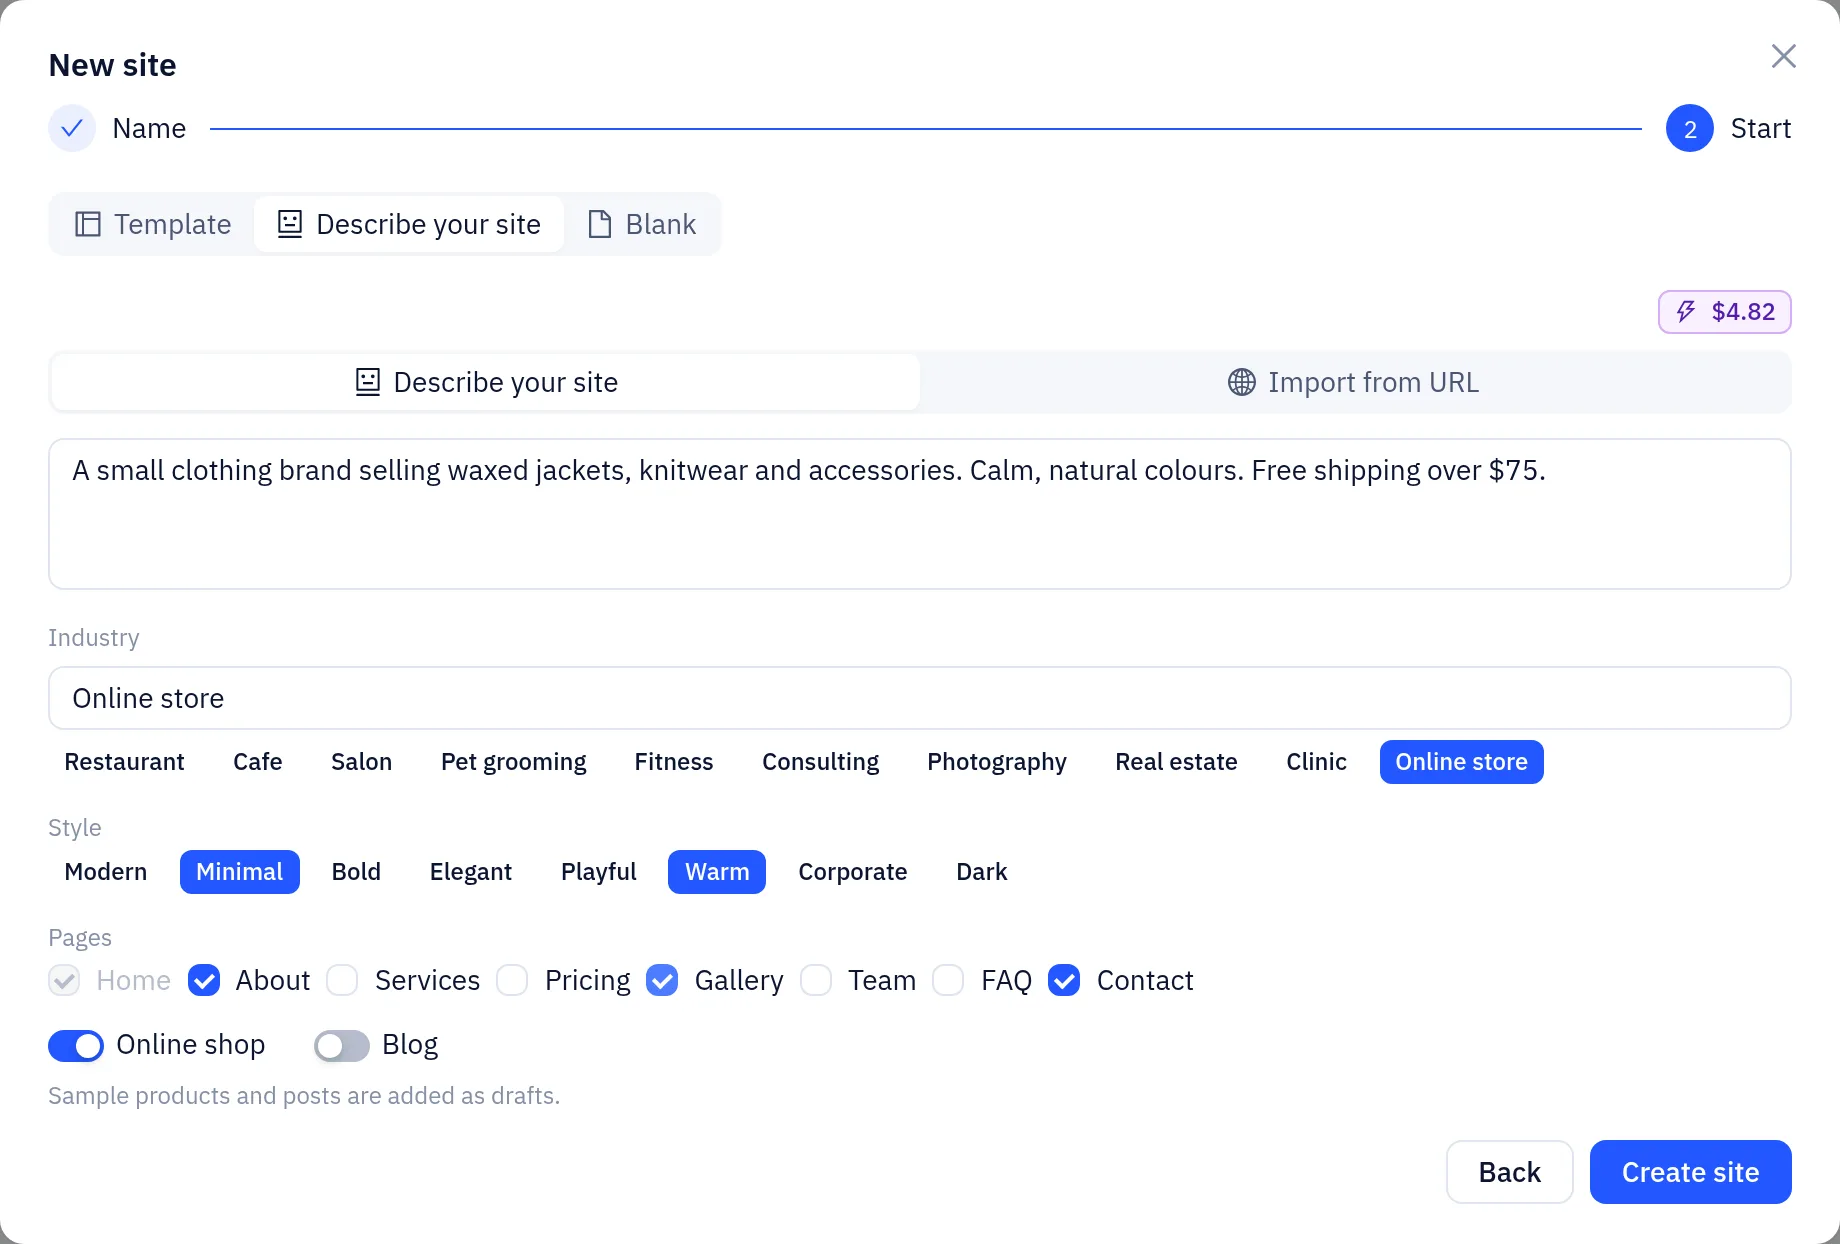
- Choose Describe your site.
- Describe the business in a sentence or two: what you offer, where, and the tone you want.
- Optional: pick an Industry, one or more Style keywords and the Pages you want besides the home page.
- Turn on Online shop or Blog if you need them. Sample products and posts are added as drafts.
- Click Create site.
To rebuild a website you already have, switch to Import from URL and enter its address. AI reads up to 10 pages, copies the images and redirects the old links. You can add a note about what should change.
The editor opens right away while AI works in the background. You can leave the page. Generated pages are saved as drafts and nothing goes live until you publish.
AI generation is charged to your LLM API balance, which the purple badge shows. If the balance runs out, top it up on the LLM API account page and try again.
Step 3: The site dashboard
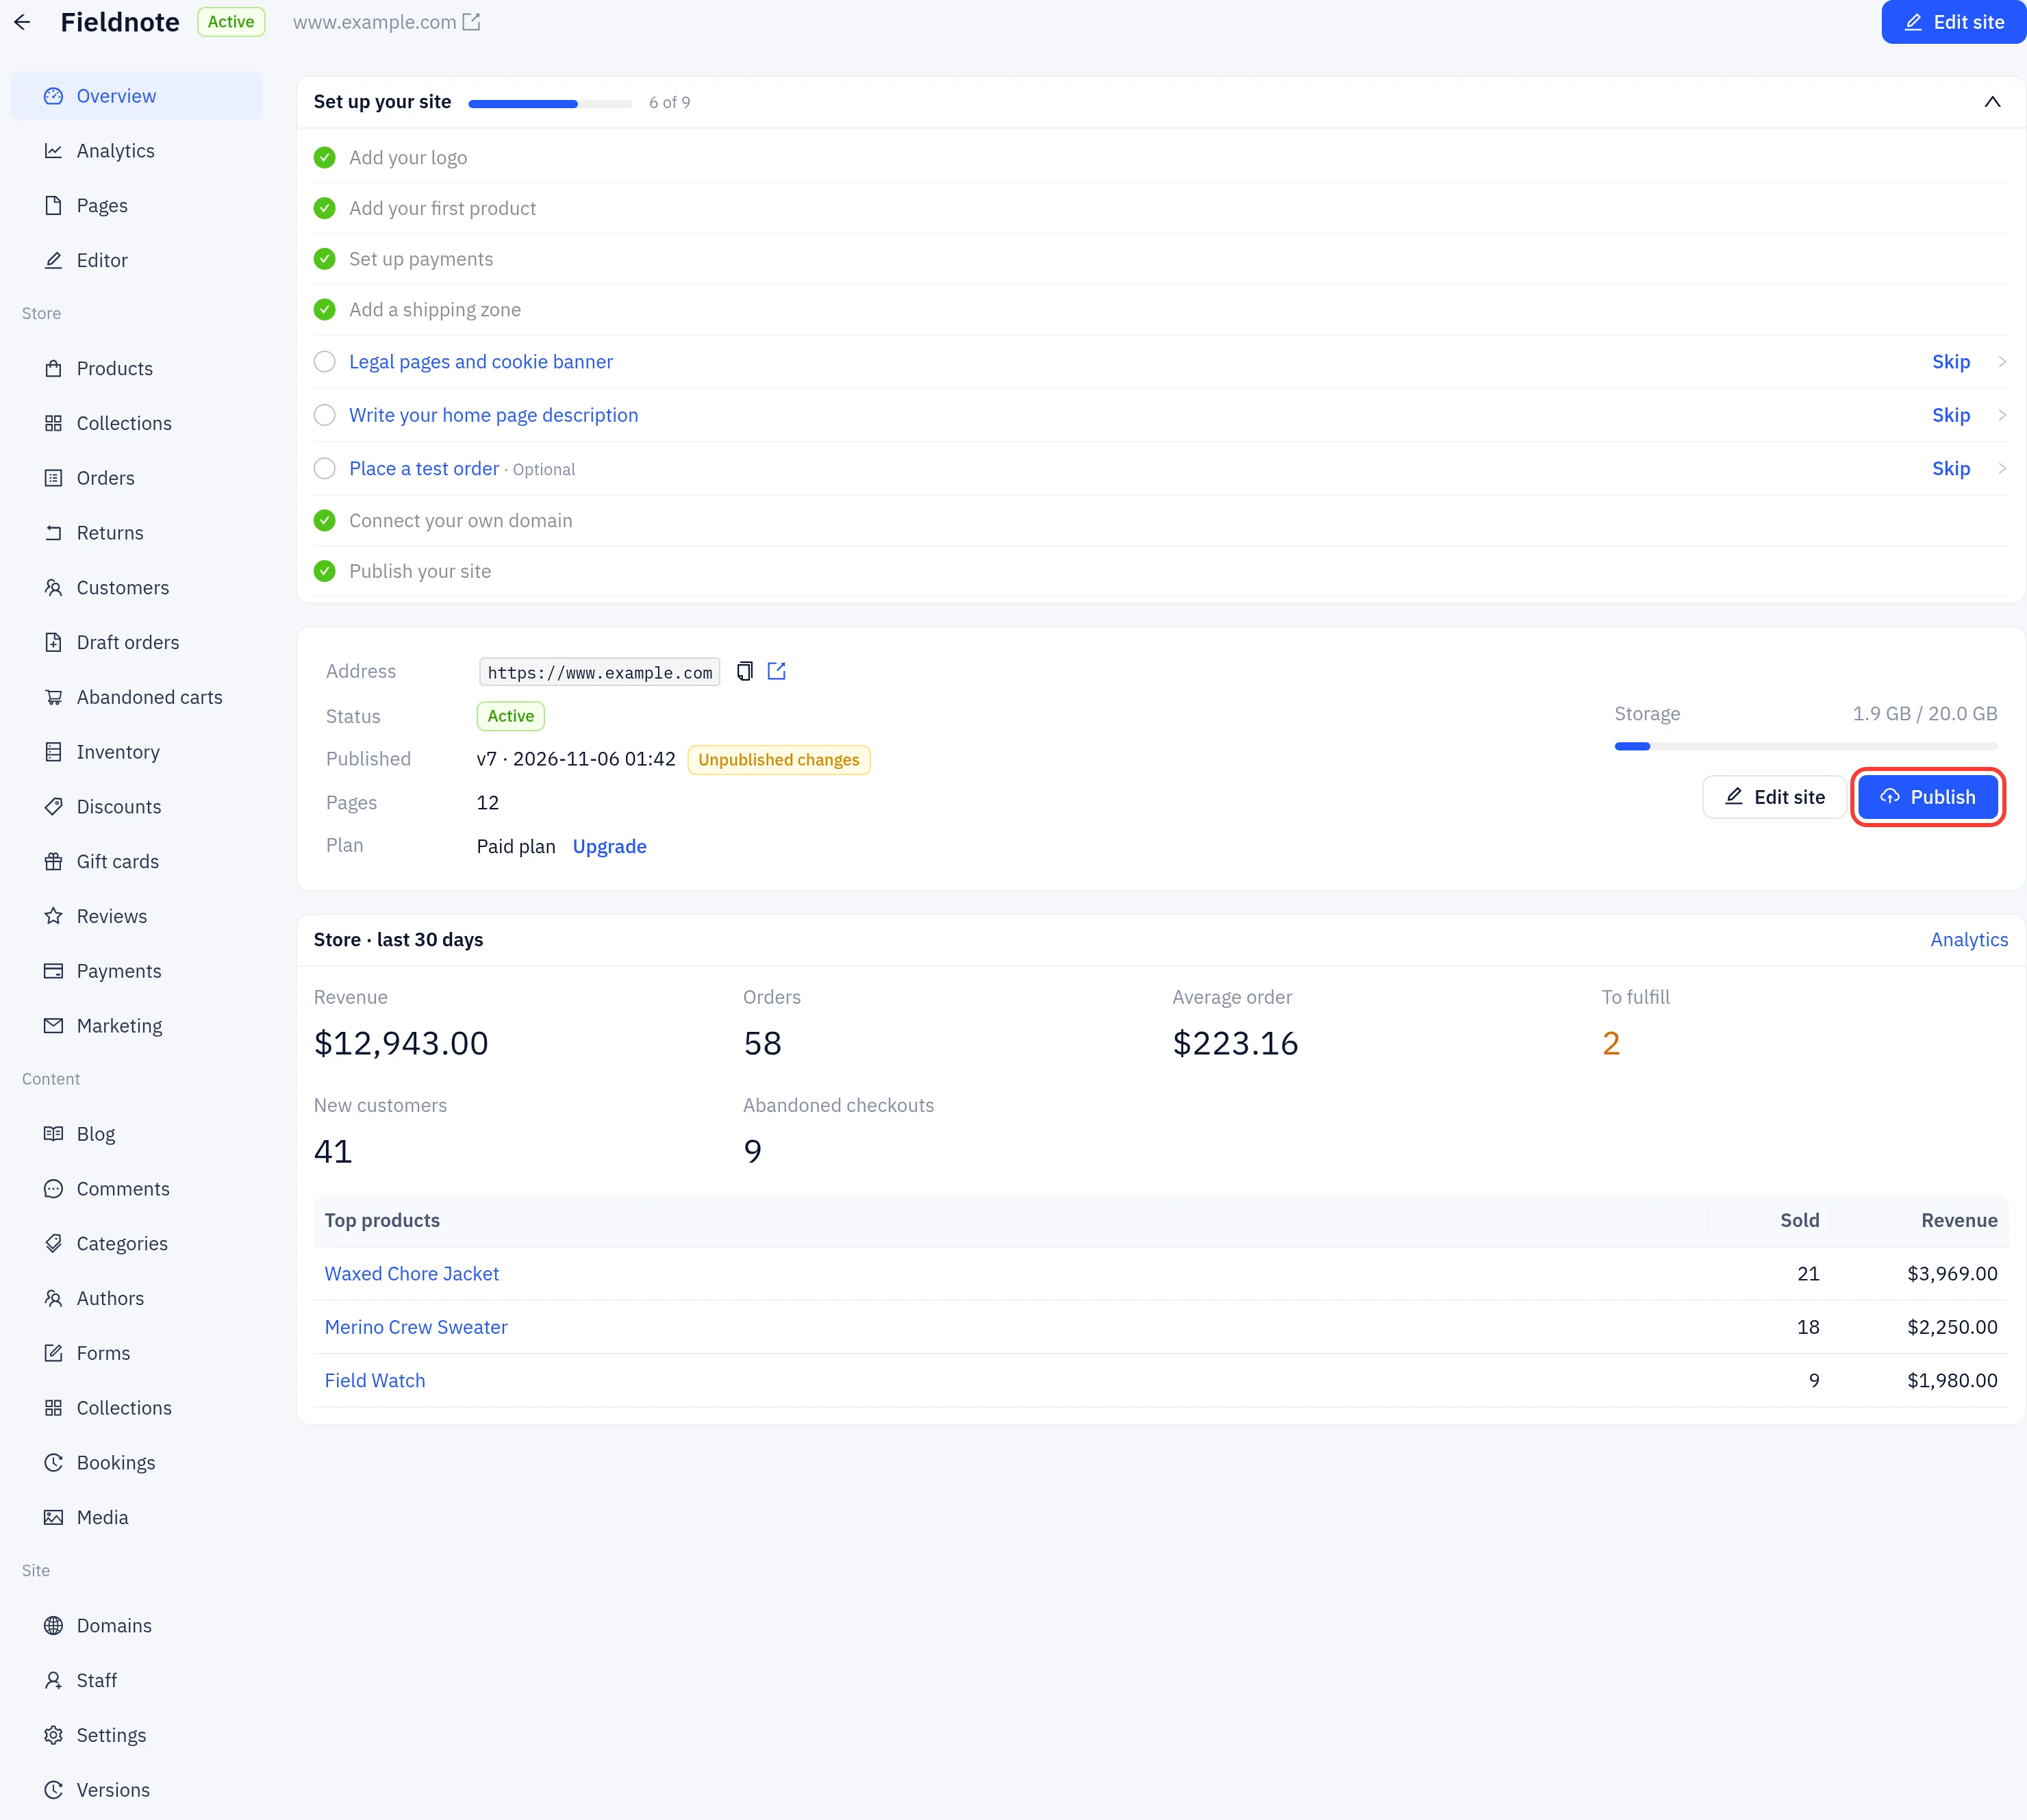
Click a site card on Sites to open its dashboard. The menu on the left groups everything for the site:
- Overview, Analytics, Pages and Editor
- Store (stores only): products, orders, customers, discounts, payments and more
- Content: blog, forms, CMS collections, bookings and media
- Site: Domains, Staff, Settings and Versions
Overview shows a setup checklist with links to each step, the site address, publish status, storage use and, for stores, sales from the last 30 days.
Step 4: Publish
- On Overview, click Publish (or Publish in the editor).
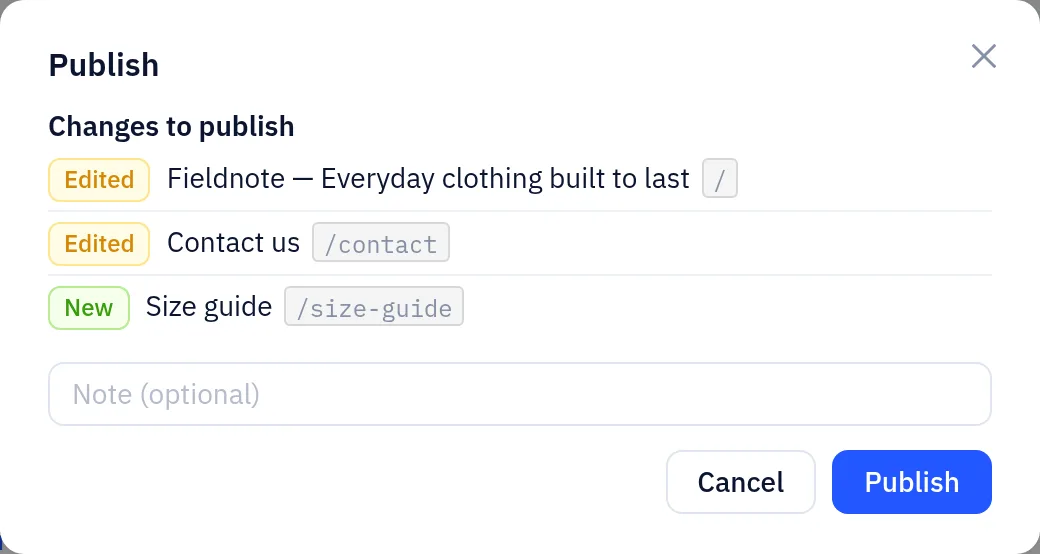
- The dialog lists what changes: new, edited and removed pages. If something important is missing, such as payments for a store, it is listed under Before you go live.
- Optional: add a note to find this version later.
- Click Publish.
A new site's free address needs about 30 seconds after the site is created before it answers everywhere. The Sites list shows a spinner on the card until then.
Every publish creates a new version. The pages you edit stay drafts until you publish again, so you can work on the site without visitors seeing half-finished changes. To go back to an earlier version, see Versions.
Manage your sites
On Sites, each card shows the site's address, status and last published version. Use the icons on a card to open the editor, the dashboard or the live site. The ⋯ menu offers:
- Duplicate: a copy with a new name and address. Products and blog posts are optional. Domains, payments and orders are never copied.
- Export (zip): a download of the site's content.